


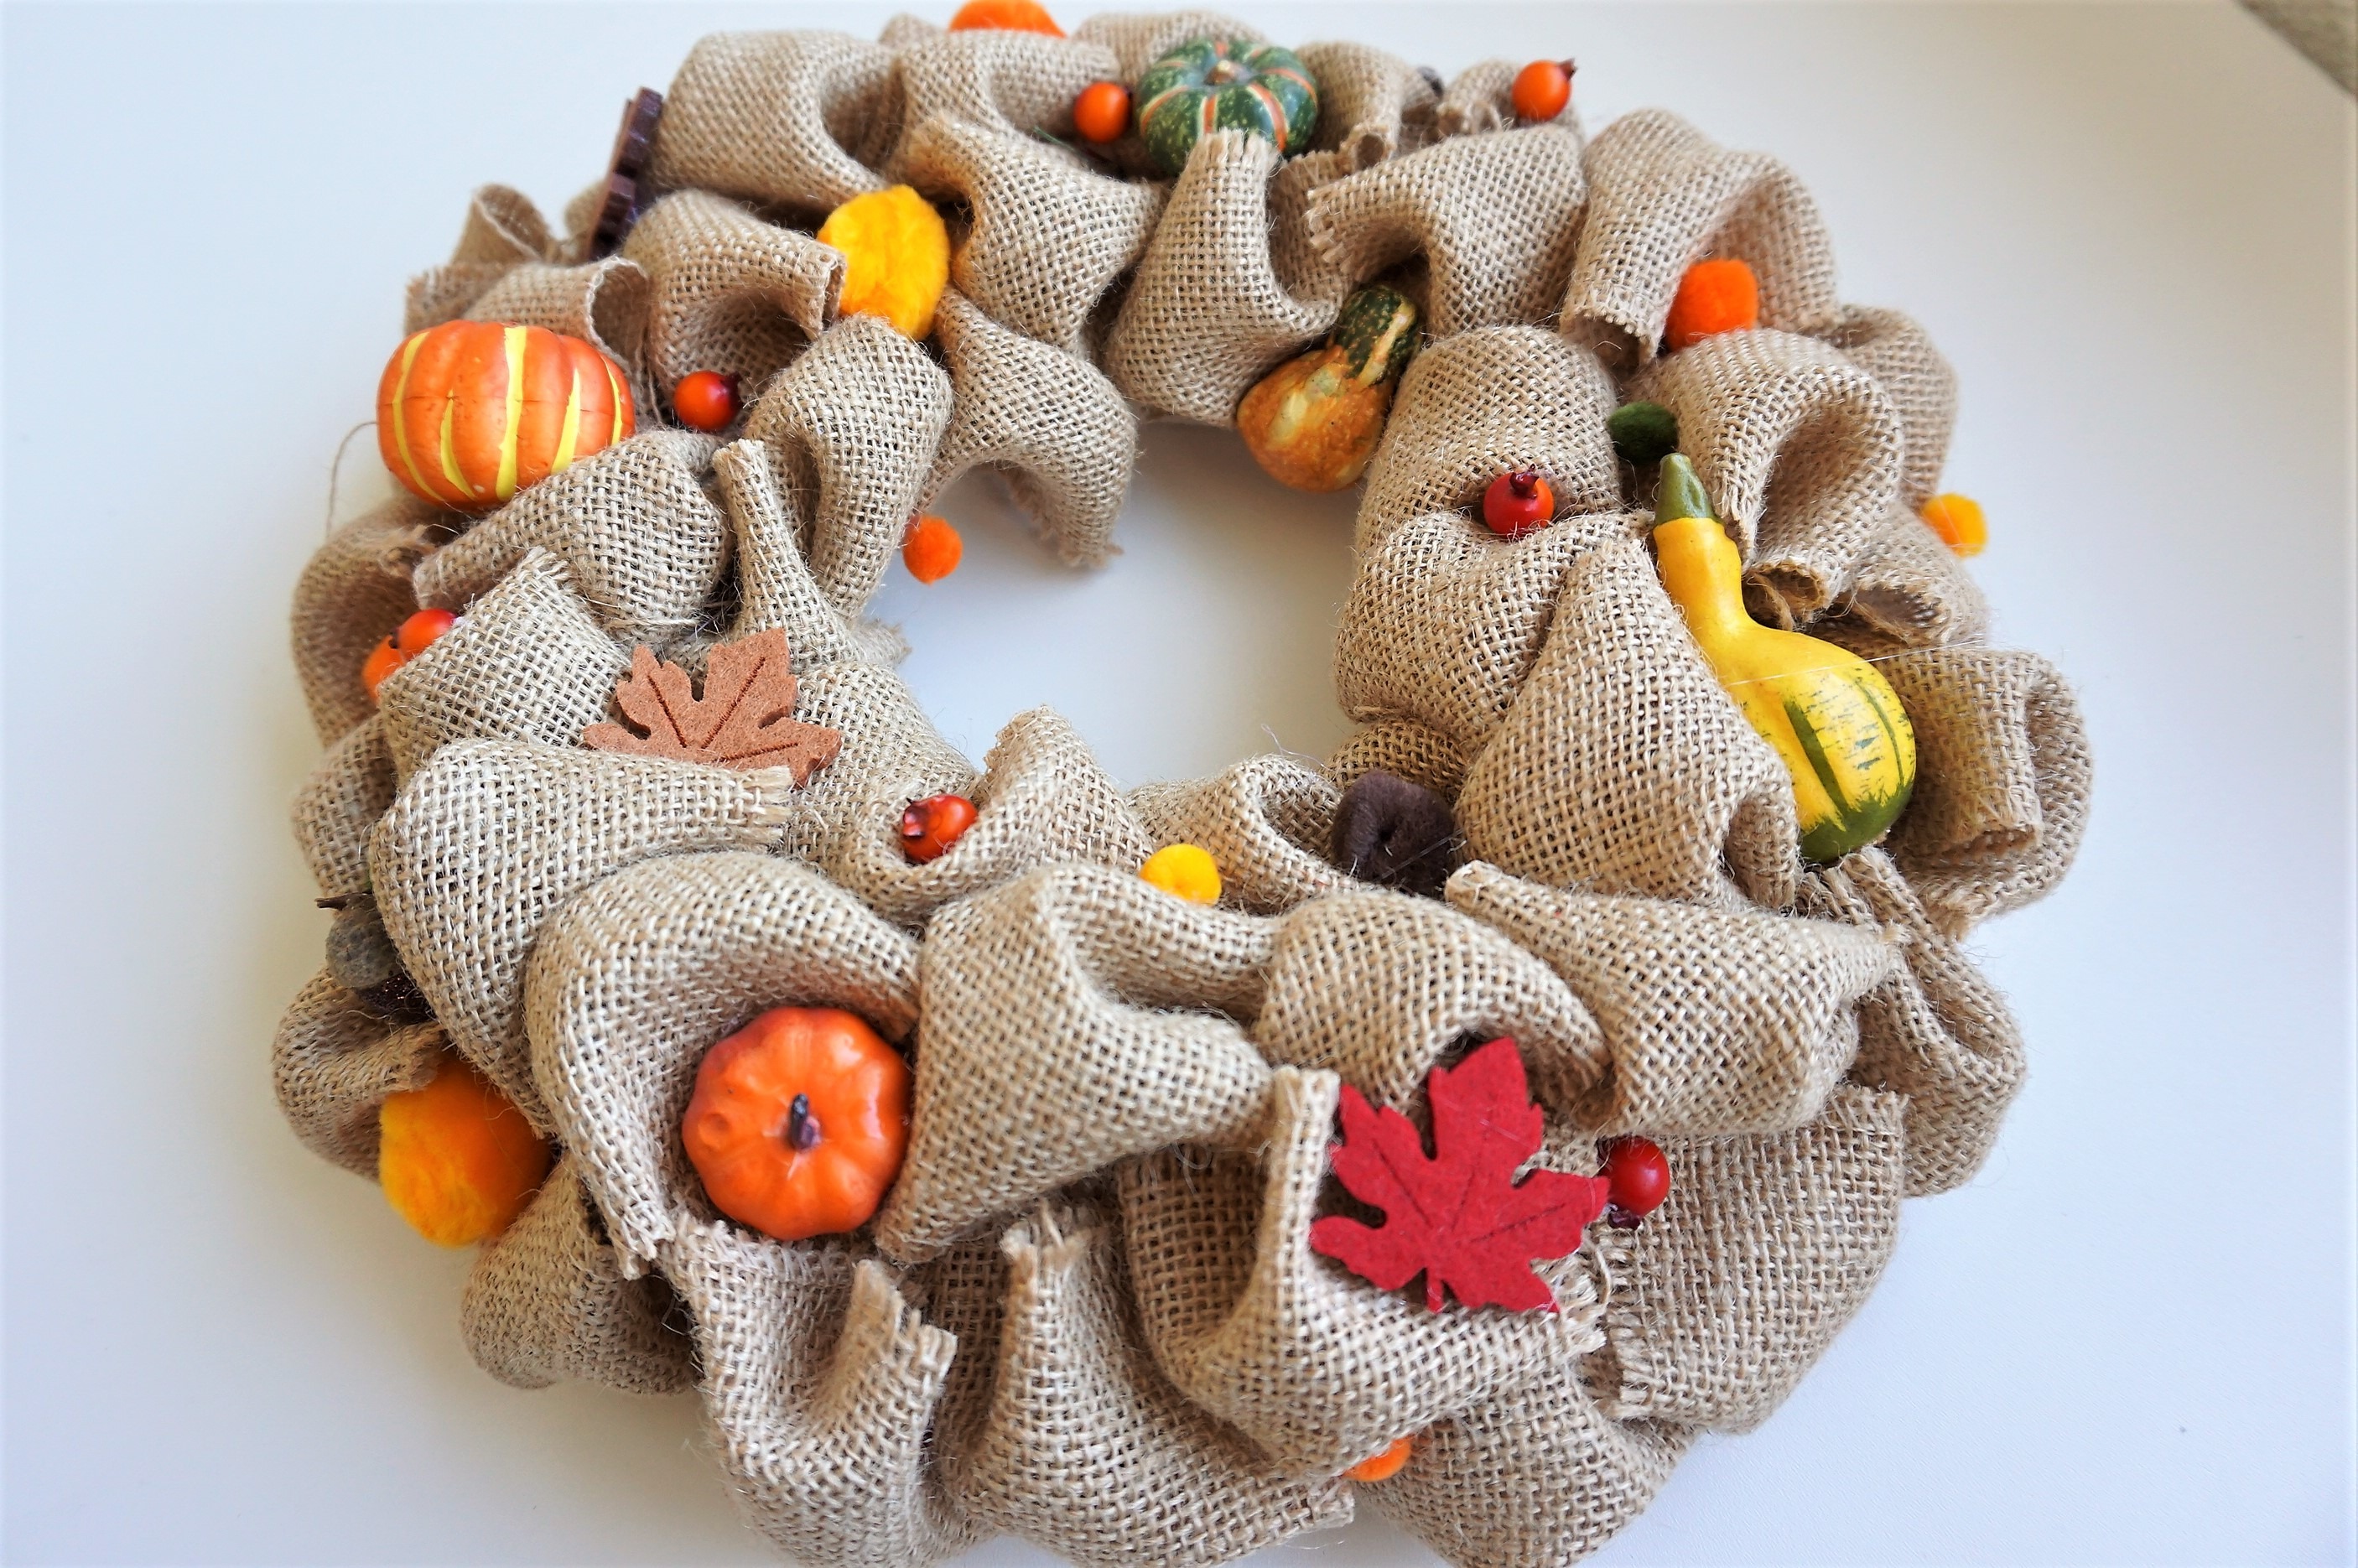
Burlap Bubble Fall Wreath
It’s almost unbelievable, but the fall is just around the corner. And so it is high time to get into making some decorations (that I have neglected in the summer). If you read my blog regularly, you know that I have enjoyed jute creation. And since I like to use ideas that have proven themselves, I decided to make the fall wreath of burlap bubbles (you could already see my Easter and Christmas wreaths).
Supplies*
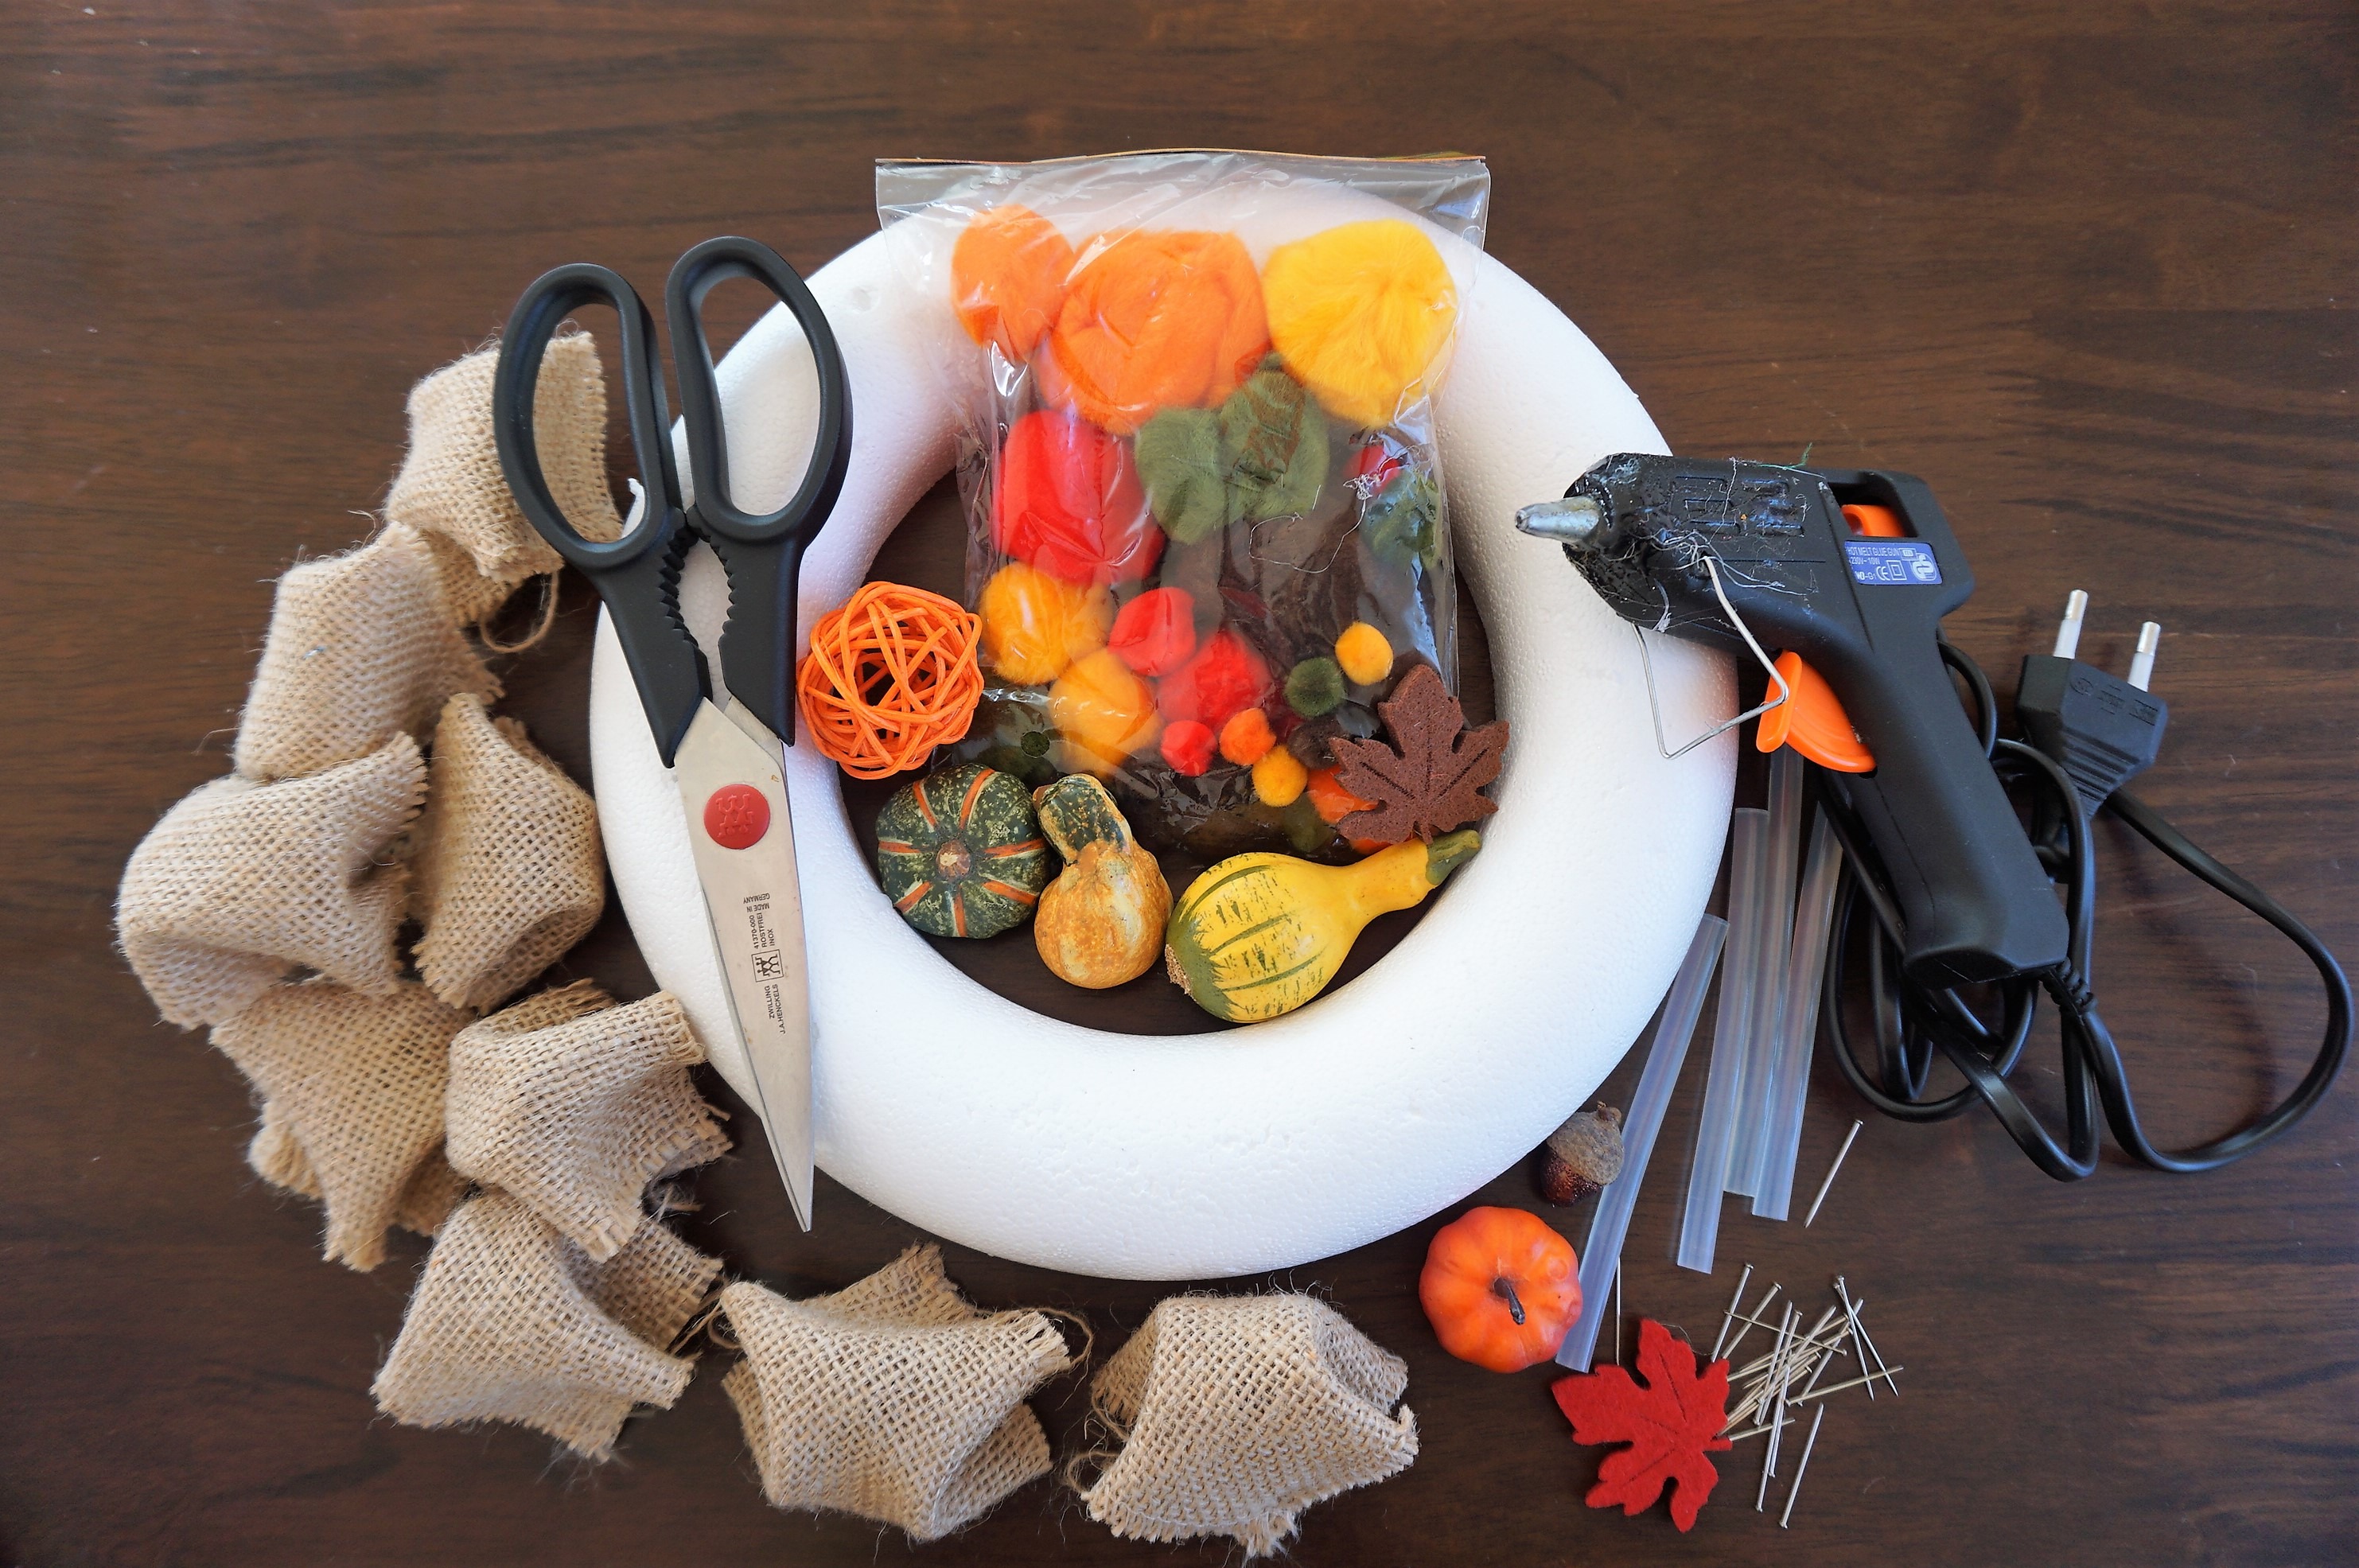
- Foam wreath form (25cm diameter)
- Burlap ribbon (length: 5m, width: 10cm)
- pins with small heads
- Hot glue gun & glue sticks
- Scissors
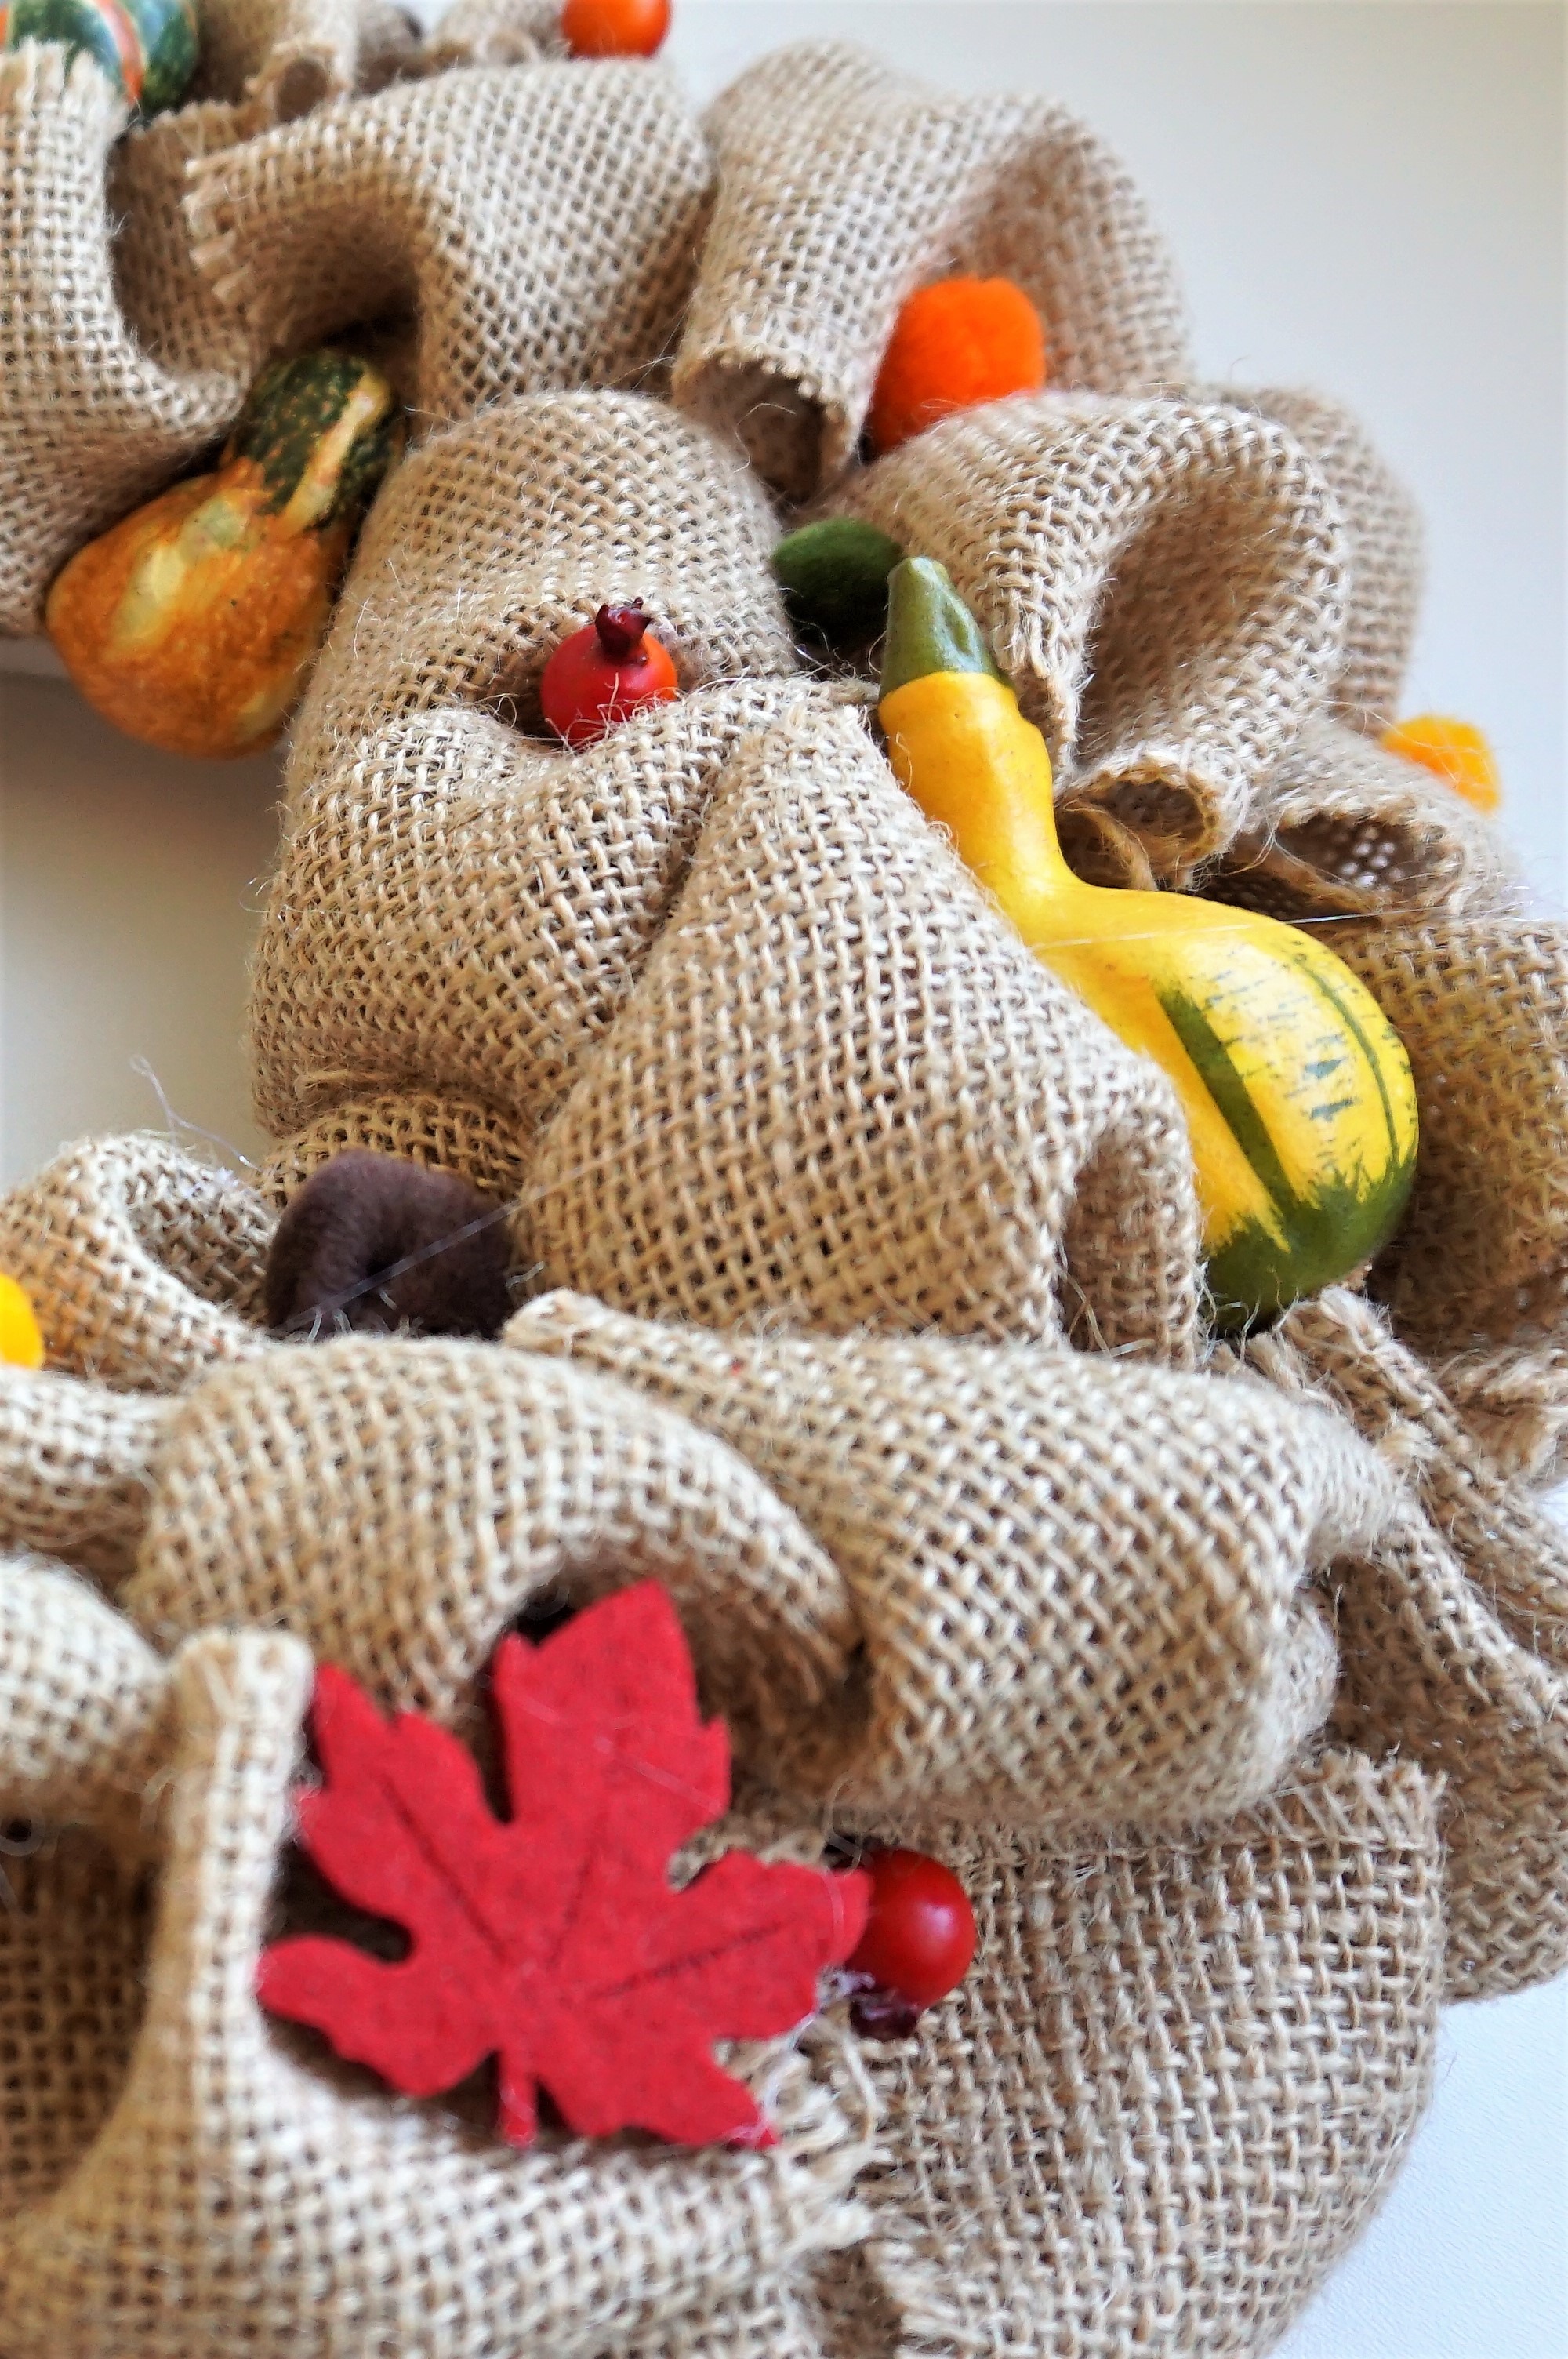
- Small decorative items (pompons, pumpkins, leaves…)
Step-by-Step Tutorial
Step 1
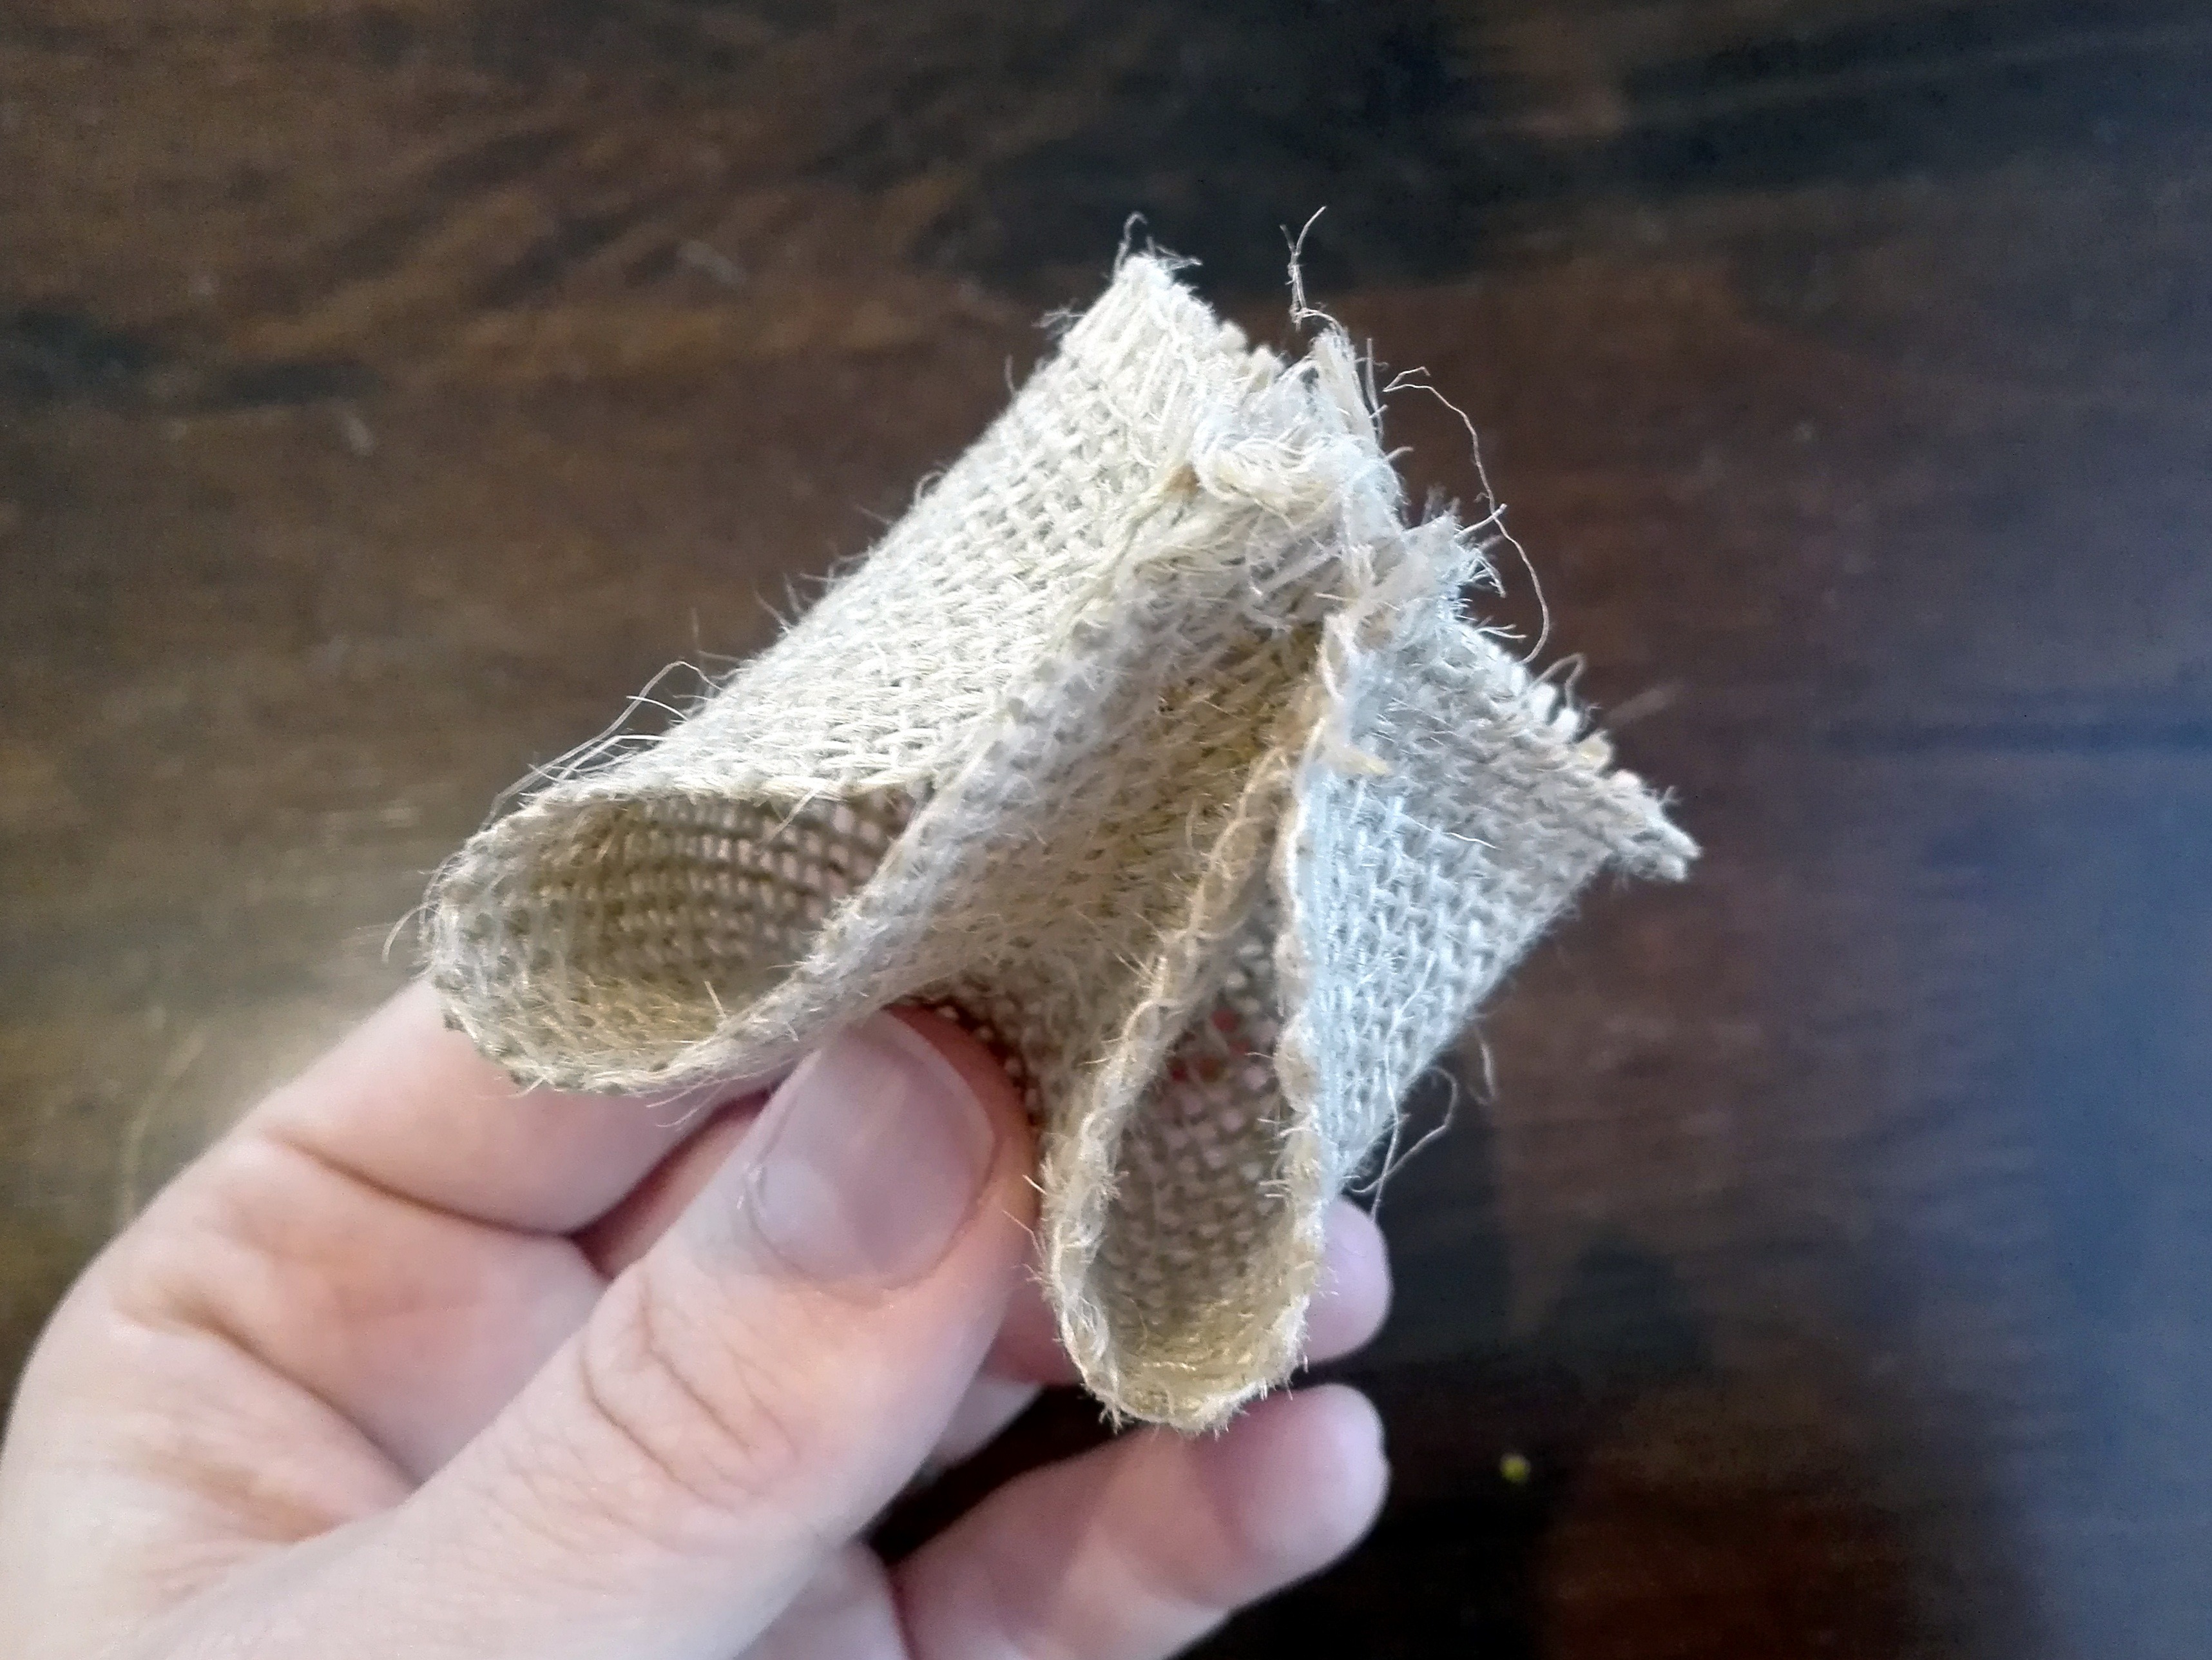
A detailed description (including photos) on how to create jute bubbles can be found in this Easter Wreath tutorial. The procedure is very simple: cut the ribbon into 10x10cm squares. Take each square, fold it corner to corner to make a triangle, put a little hot glue and stick together. Bring the sides together – put a pinch of glue to each corner, and fold the both sides towards the center of your triangle – and here is your bubble 
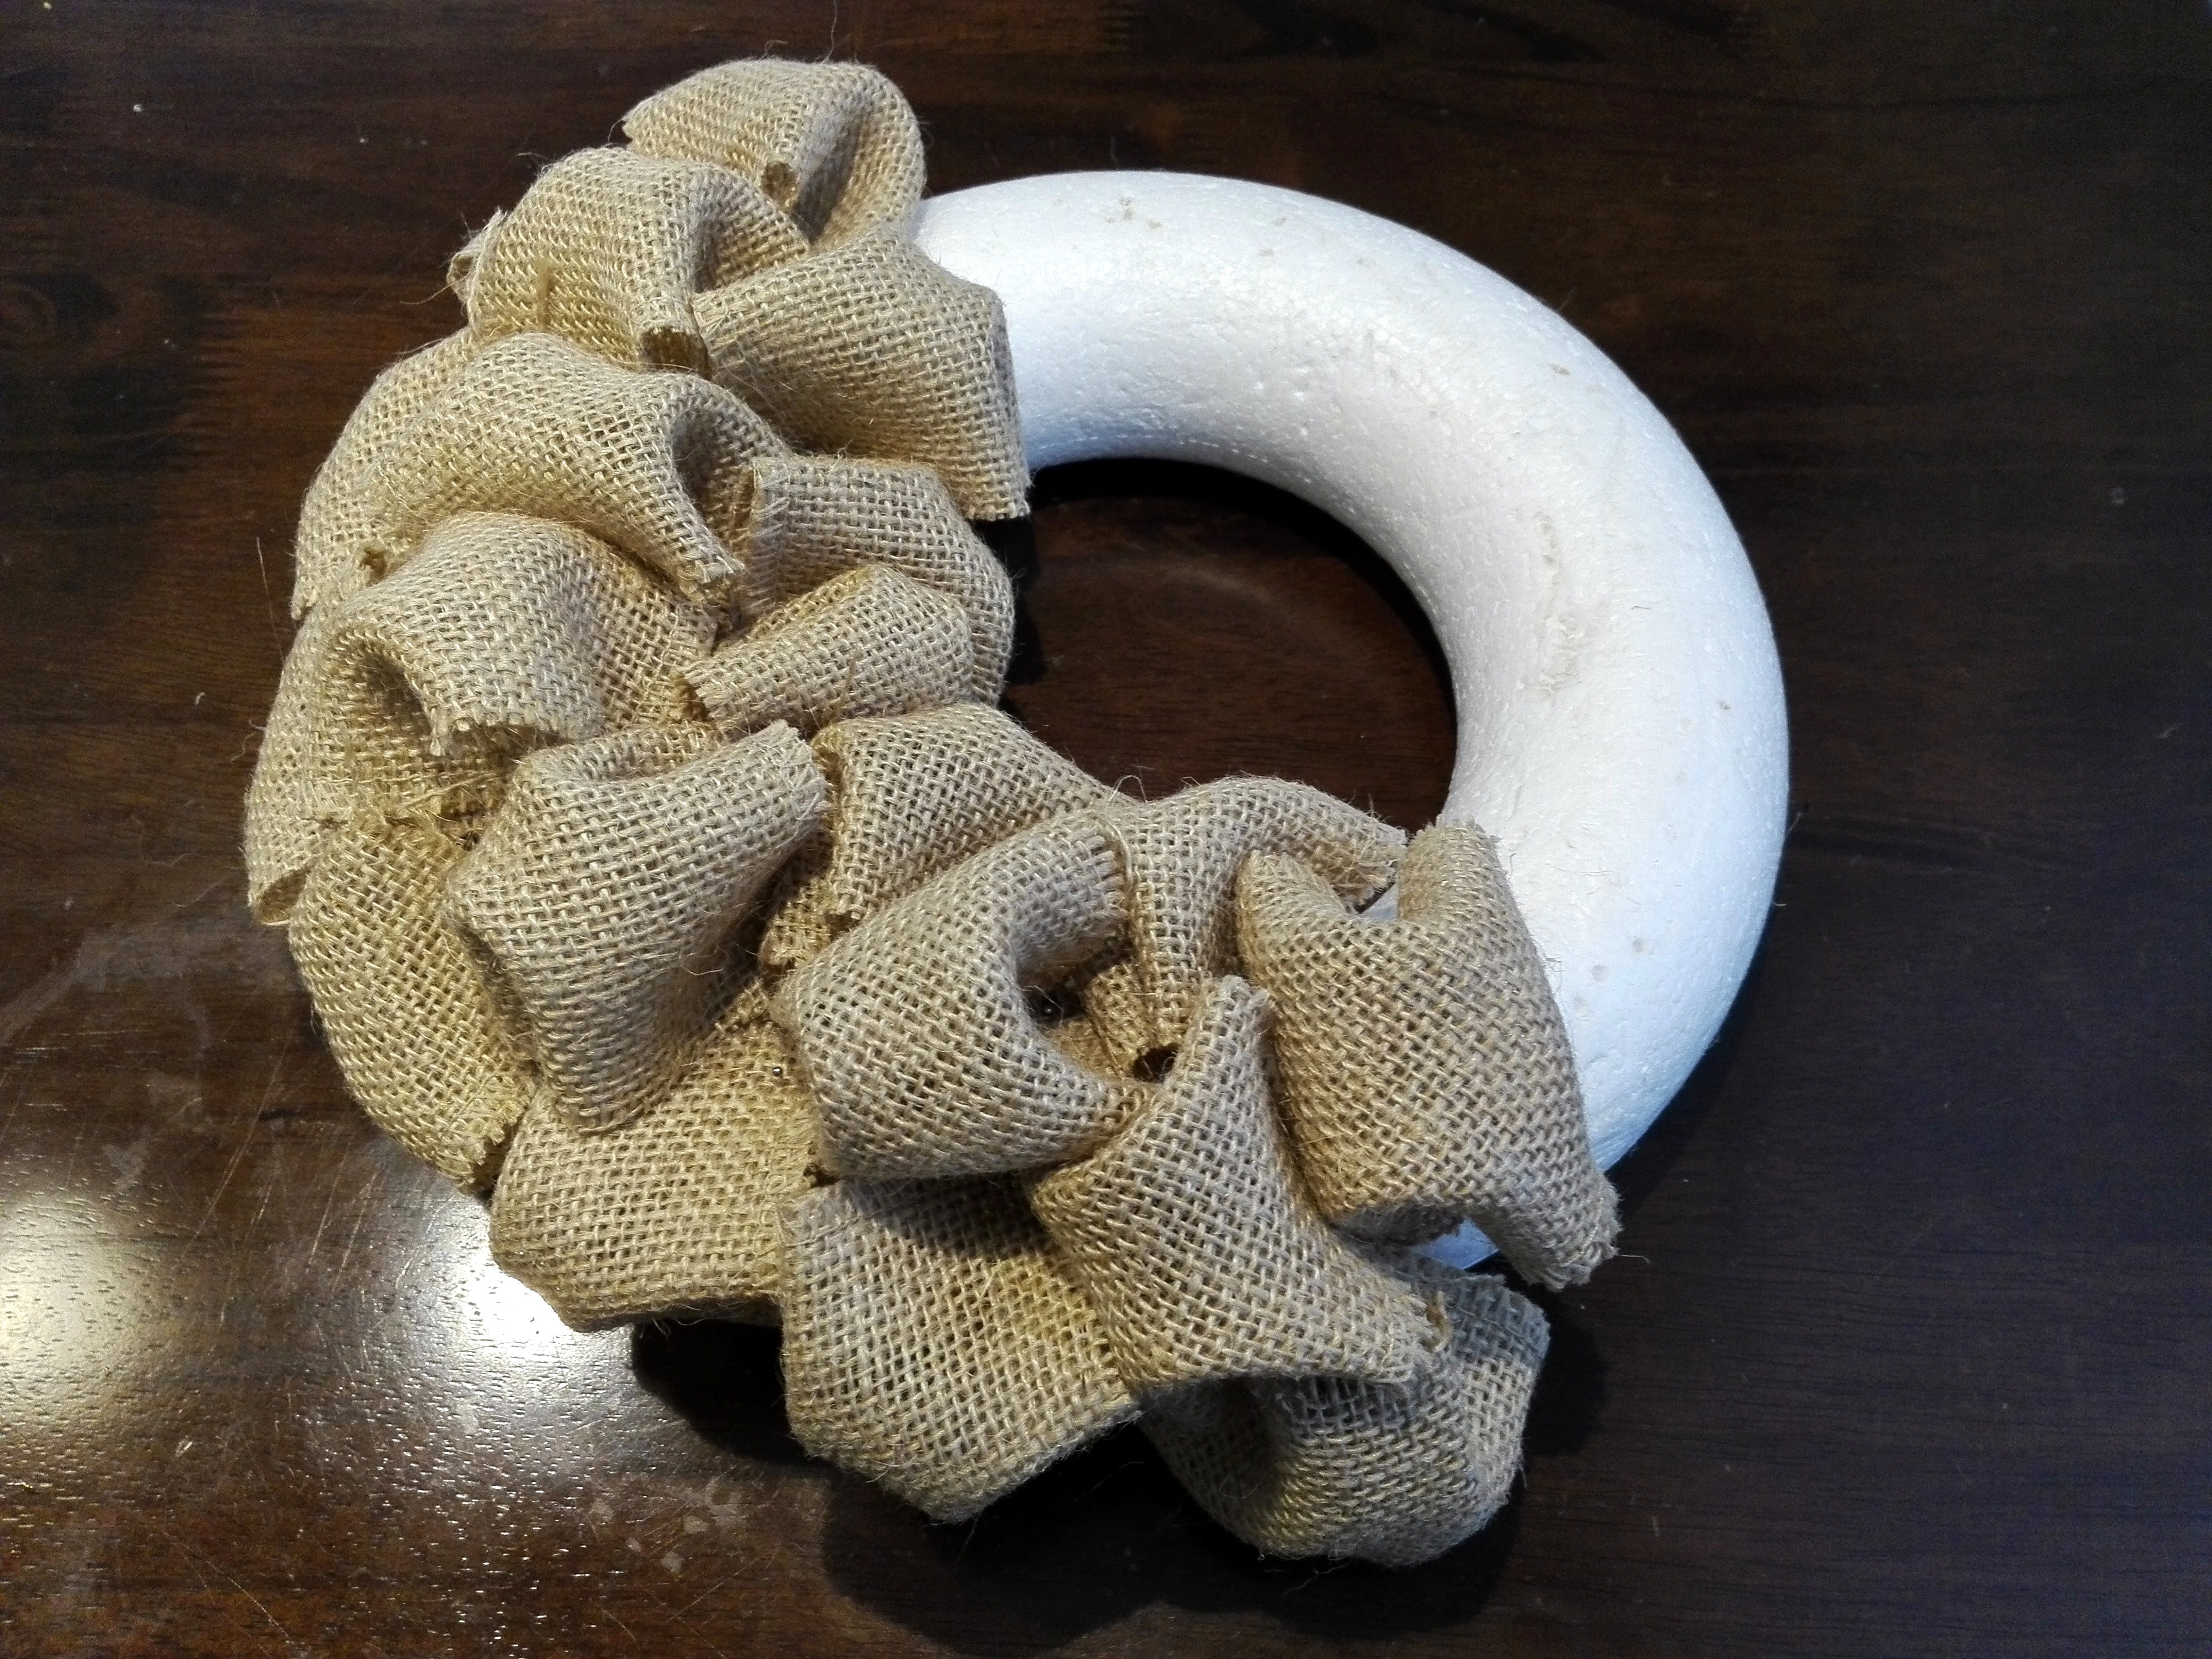
Step 2
Take a pin and push it through the bottom edge and attach it to the form. Keep pinning your bubbles (that should slightly overlap) until you have covered the wreath – don´t worry, it goes pretty quickly. If you spot the foam underneath, just fluff the bubbles.
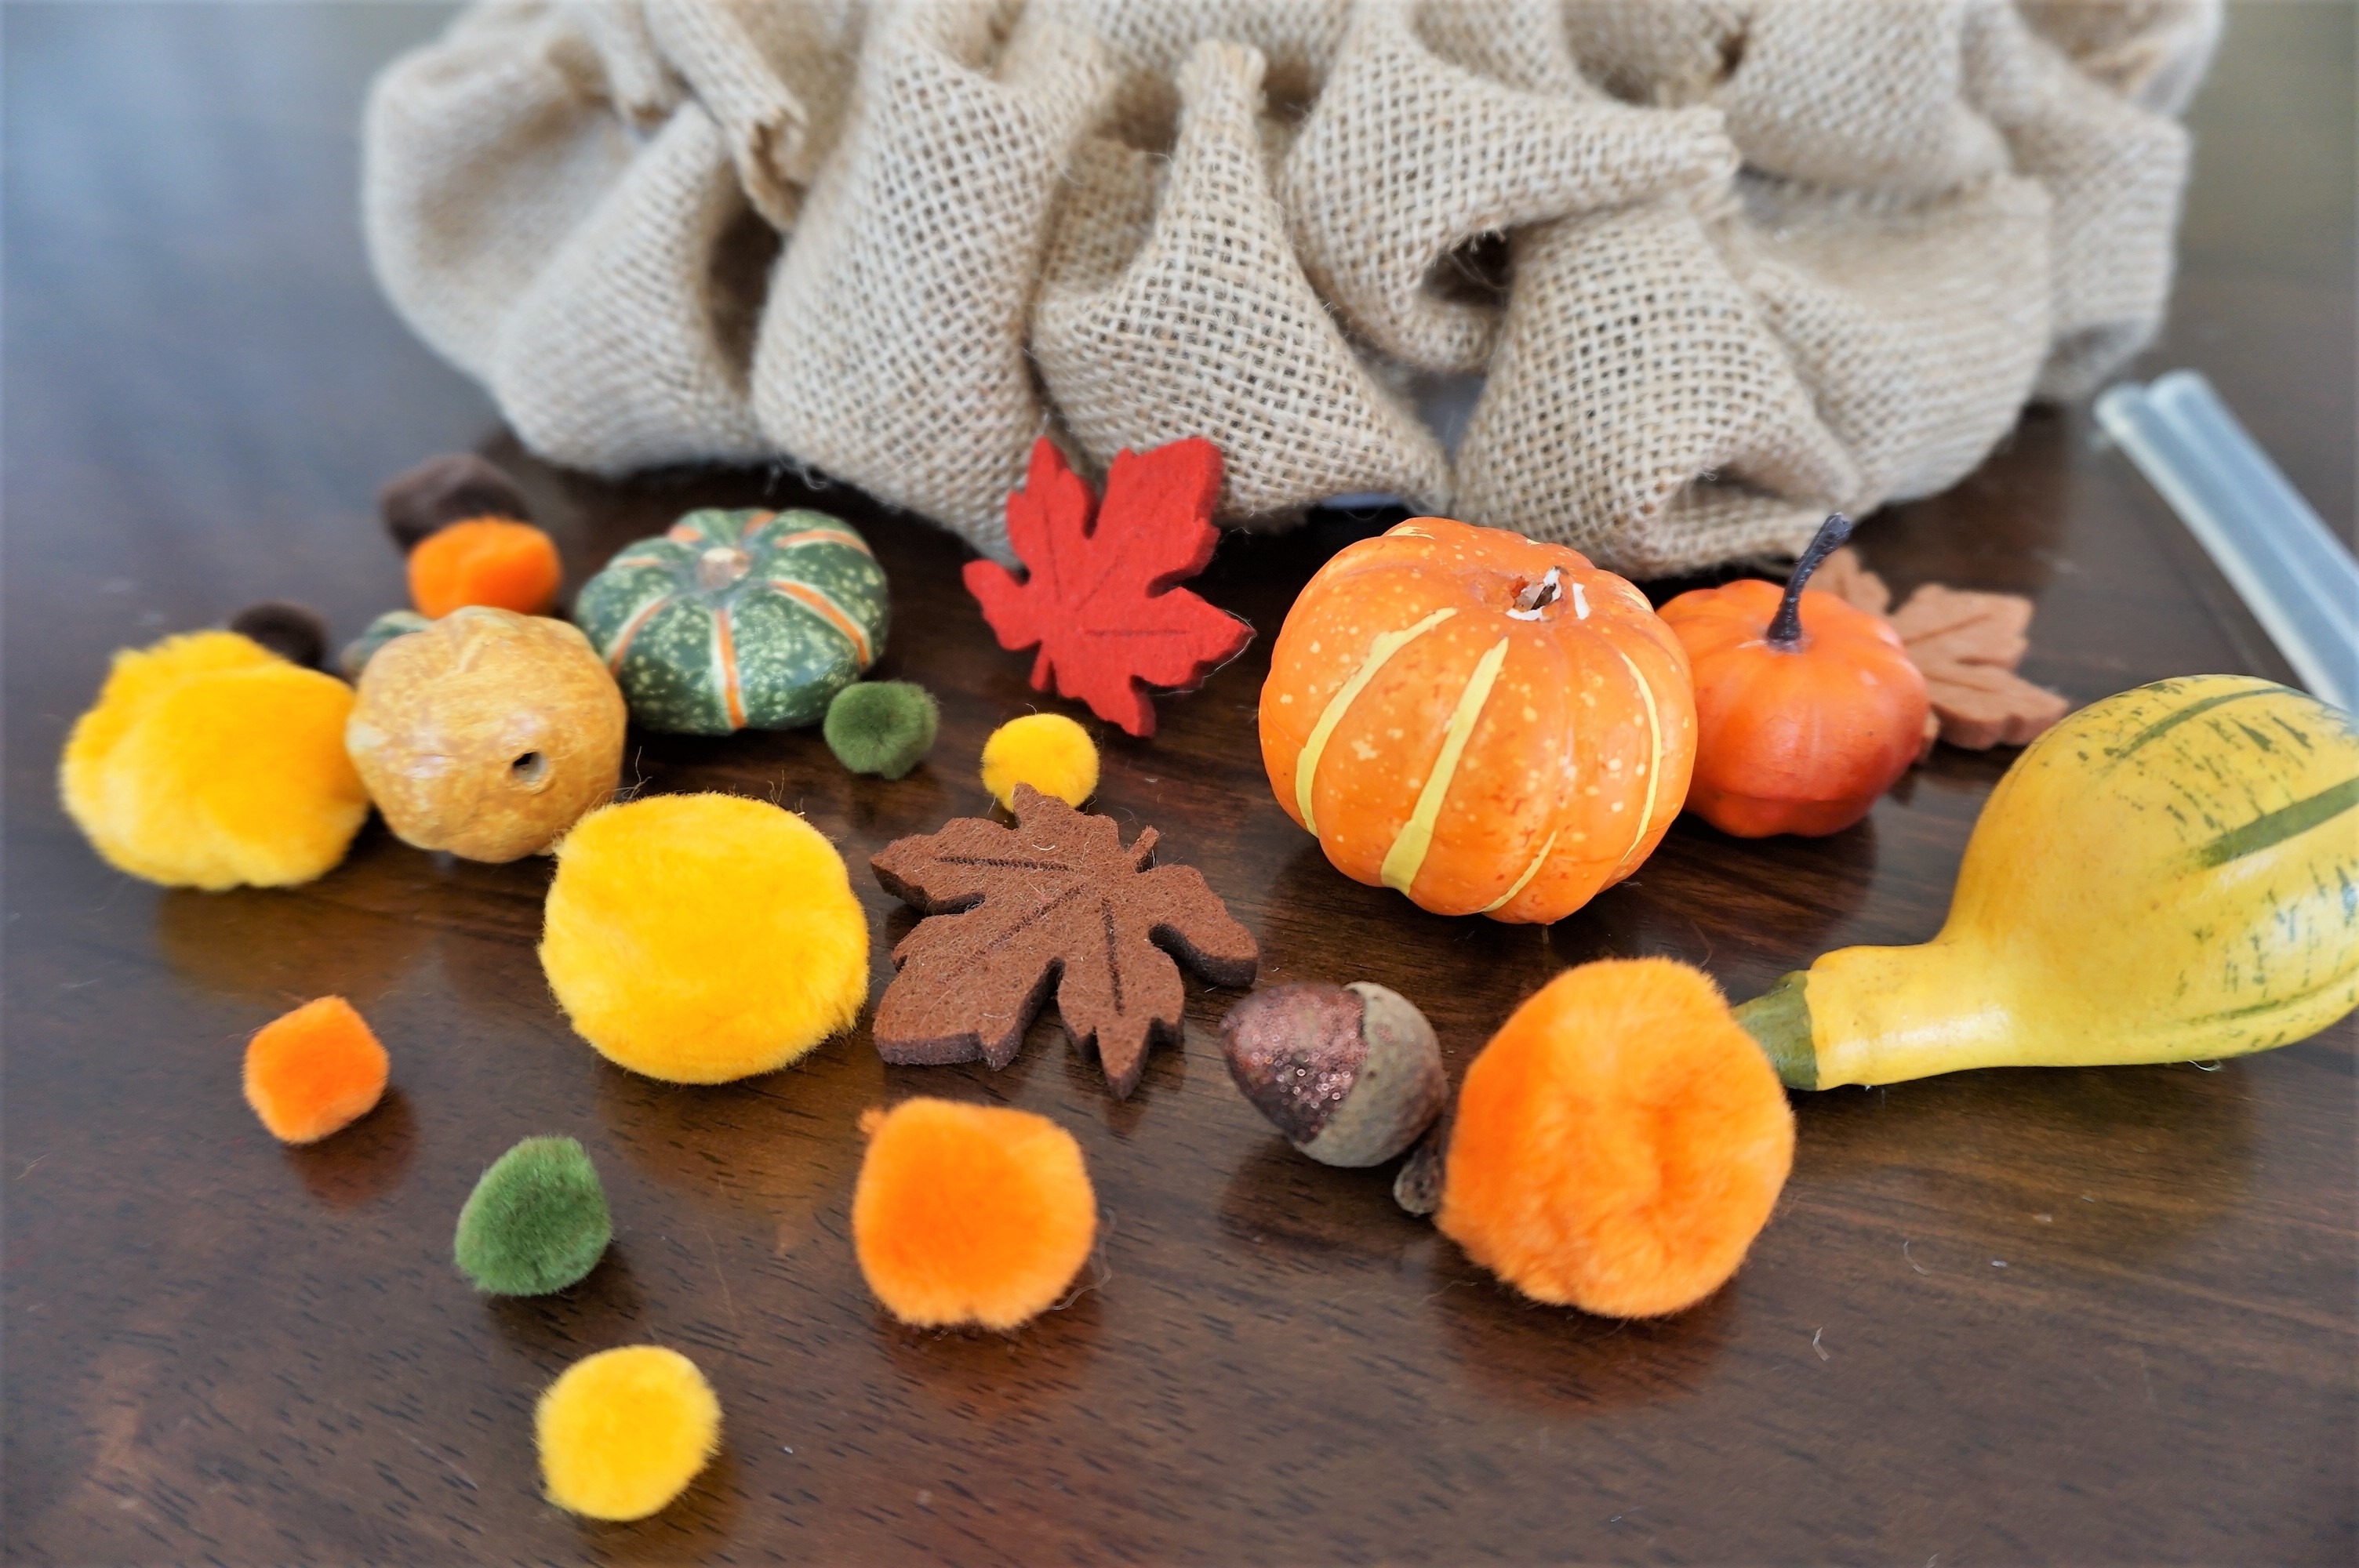
Step 3 – decorating
And now the best part comes in 🙂 Using a hot glue gun, I stuck a variety of small decorative objects on the wreath. If you have made glittering acorns according to my previous tutorial, you can of course also use them (and if not, you can find the tutorial here).
The result
I think you could see that making this wreath is nothing complicated. I like the fact that bubbles can be used for another wreath. Exactly following the current trend of upcycling: just do not throw old things, just give them a new coat and use them again 🙂
And what about you? Do you have a ready-made decoration for this fall? If you like my tutorial, do not forget to share it with others and save it on Pinterest! Thank you 🙂 And I wish a nice fall full of colors!

*This blog is a participant in the Amazon Affiliate program. If you purchase from Amazon using one of these links I may make a small commission at no additional charge to you! I don’t ever link to items I don’t actually recommend!


I am a member of


Map of activites

Podcast
You may be also interested in
Social Media
Categories
Subscribe
5 Comments. Leave new
This is so cute! You could also probably put a big candle in the middle and use it as a centerpiece on a fall table. Thanks for sharing 🙂
This is so cute! Even though I am not that crafty this makes me want to try it. Thanks for sharing 🙂
That is stunning! I love Autumn almost as much as I love Winter, I always change my home decor to match the season! Thanks for the idea!
So clever! We’ve been looking for a new holiday craft project we could do with the grandkids. Your timing is impeccable!
This looks super easy to make.