Ironing beads are a great activity for kids for rainy afternoons. There are countless colors and patterns which kids can create and train their fine motor skills with. In today’s post, I will show you how to easily make a framed picture of the “kid art”.
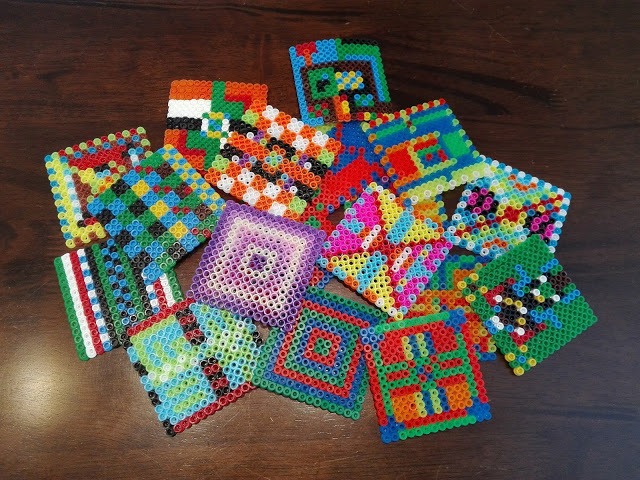
After our started attending local kindergarten, the amount of his artwork began to flow into our house, as it was back in the Czech kindergarten. Among various drawings, lots of small plastic patterns made of ironing beads started to appear. When our younger son entered kindergarten, their numbers began to grow dramatically, and I wondered what to do with them. I did not want to throw them out because sometimes they were interestingly patterned, plus nicely resembled the different characters of our children: on the one hand, the precise geometric patterns, on the other hand, randomly placed colored beads – in a word, chaos 🙂
When I ran in the local thrift store to a wooden frame for pennies, there was nothing to think about. It was also an embroidered picture that I got from my friend as a wedding gift, that inspired me.
Supplies
- square-shaped ironing beads creations
- frame
- textile color
- acrylic color
- brush
- hot glue gun & silicone sticks
How to use ironing beads
If you buy your kids ironing beads, I recommend having all from one brand. They are not all the same size and then you could have problems with their fusing (they might not adhere to each other well).
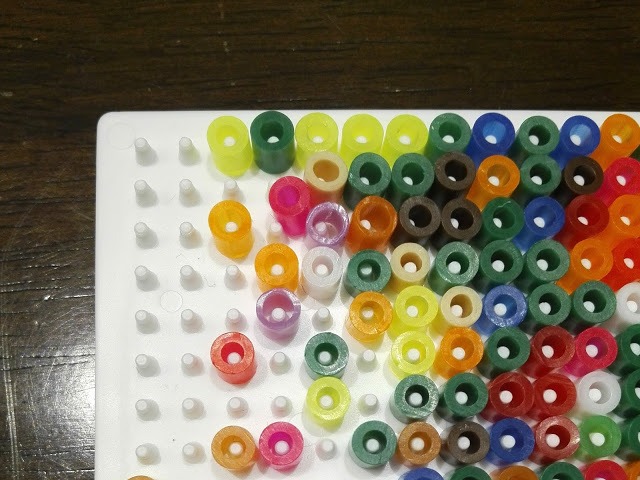 |
| Look at the lilac beads – they are a bit narrower than other |
Then, the procedure is quite easy – choose your pegboard (for this picture the square-shaped) and arrange beads on it. Then take an ironing paper (a baking paper will do well too) and place it over the beads on the pegboard. Heat your iron on the medium setting and then run it over the paper. Continue until the beads fuse together – you don´t have to worry – you will see it through the paper. Then let it cool down, take the beads off the pegboard and peel the paper away.
Making a framed picture
As I mentioned above, I´d bought an old picture frame. Although the color was pretty nice, at some parts had begun to peel off.
That´s why I repeated the process I used during the last year´s renovation of an old picture frame – you can find it here. I painted it using a dark-blue textile-color (dissolved in hot water) and after drying I applied an acrylic paint. To achieve the desired color I mixed dark blue, black and silver.
I also painted a cardboard, which formed the rear side of the frame because it then served as a pad for gluing the beads.
Then I began to making the picture. I´d first put the squares randomly on the pad until I was satisfied with the final form, then I started to glue them.
I admit, I didn´t measure exactly the distance between the squares and glued them “by eye” 🙂
But the final result is not bad, what do you think?
If you liked my tutorial, don´t forget to pin it on Pinterest!
If you don´t want to miss any of my recent posts please sign up for my blog in the top right-hand corner of this page. Thank you 🙂
I will appreciate any time if you share my posts on Facebook or Twitter. It helps get my blog out to more people, who may like my posts.
And of course, I look forward to reading all your comments.